
Building an API without Code
Think about this:
How do you retrieve information from computer?
Take this scenario - you have navigated to your favourite news site or subreddit to procrastinate for a while on that thing you really should be doing. In doing so, how often do you think about how the website appeared on your screen? Where do those cat memes on your screen actually come from?
Humans and computers comprehend data very differently. We as humans can read words on a screen, or process the experiences presented to us in the form of websites, applications and command line interfaces. We can make assumptions about things that we see, based on our previous experiences and memories.
Computers, on the other hand, cannot. They process numbers at their lowest level. Based on the sequences of numbers, the computer will perform a specific set of tasks. This makes computers extremely good at repetitive tasks that would be either very tedious or very difficult for a human to do as quickly and as consistently as a computer can.
There are a a lot of intermediate steps that occur between the purely logical, number crunching power of your computers internals and the beautiful, highly immersive visual experiences that modern technology allows us to enjoy today. How does the computer perform its work and tell us what we want to know in a format we understand?
A website making it from a web server to your eyeballs is not possible without an Application Programming Interface (API). APIs are how your computer interacts with data and are the foundations on which a majority of the modern web is built. An API is a simplified interface allowing a developer to integrate their program with another existing one. You could think of an API as a book that only your computer knows how to read from or write in.

Some simple examples:
- When you visit your favourite news site, you get the latest news stories from that sites API.
- You can build an app that sends email by using the gmail API.
- You can sign in to many websites with just your facebook account by using the facebook authentication API
APIs generally define a contract which details the operations the application that uses the API can and cannot do. Staying with the book analogy above, this would mean certain books only let you write specific words in them, in a specific language. This helps prevent bad actors from doing rather annoying things such as abusing your API and potentially crashing your server, or getting access to your data.
With hundreds of thousands of APIs available and thousands more being created every day, there’s really no escaping APIs when you are building software. Most applications are enhanced a great deal when they are integrated with others. This is true regardless of whether you are building applications with code or no-code tools.
To build an API with code, you generally need knowledge around the following software development topics:
- Server side programming languages (Python, Ruby, Java, NodeJS etc.)
- Databases
- HTTP (the protocol that powers the internet by allowing communication between web browsers and web servers)
- Infrastructure and deployment - getting your code to run on a public server so other people can use it
There are many tools that make the above much easier, but there’s still a lot to learn if you just want to a simple API that works for you.
In this post, we are going to build our very own web API without any code at all.
In a time where software is eating the world, it’s increasingly important to understand the concepts behind the devices and technology that you are likely to use for a large portion of your day. Being able to explore technical topics without learning programming is a very powerful for anyone with interest in how the world around them works.
Let’s get into it.
Our Tools
We are going to use 3 tools in this tutorial:
- Integromat - an automation platform that lets us glue different applications together without code
- Postman - an API testing tool. We are going to use this to interact with our API
- Google Sheets - We are going to use google sheets as our “database”. This is where the data sent to our API will be stored.
Our API
We are going to use the slightly contrived example of building an HTTP API allowing people to vote for places to go for lunch near the office. We want consumers of the API to be able to register their vote for a particular lunch spot near the office. This will increment the count of a particular lunch spot by one.
Setting Up Our Google Sheet
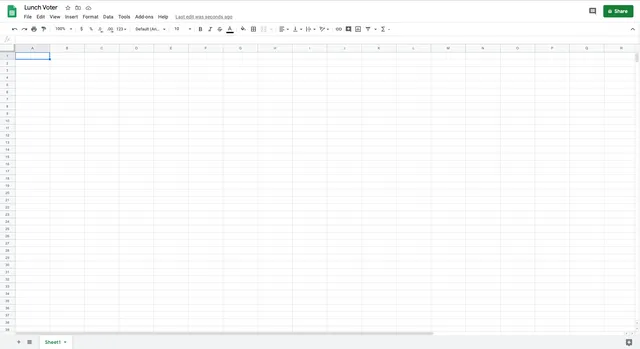
First of all we need to create a google sheet. Nothing particularly challenging here. Just go to google sheets and create a blank spreadsheet. Let’s call it “Lunch Voter”.
Integromat
We now have our “database” set up. Let’s create our actual API now to interact with it. First of all, you will need to create an integromat account to get started.
Integromat is billed as the “glue of the internet” and for good reason. It allows you to connect well over 200+ different applications with each other. For example if you want to automatically save gmail attachments to your dropbox account, or send you zoom links directly via WhatsApp for an upcoming calendar meeting, Integromat is your friend.
The above example are some of the simplest things you could possibly do with integromat - you can automate almost anything with the platform.
Creating an Integromat Scenario
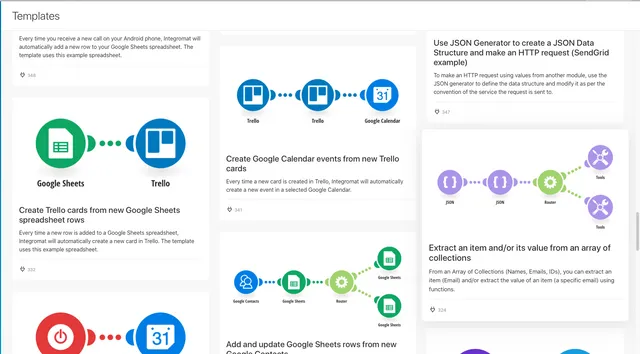
Integromat uses a very intuitive flowchart structure for you to define your workflows or “scenarios” as they are known. Let’s create a new scenario for our lunch voter API by Navigating to the integromat dashboard and clicking the “Create a new scenario” button.
You will be taken to a page allowing you to select integrations you want to use. This step is optional, as we will have access to all the integrations that we need when we get into the integromat builder. Let’s click “skip” for now.

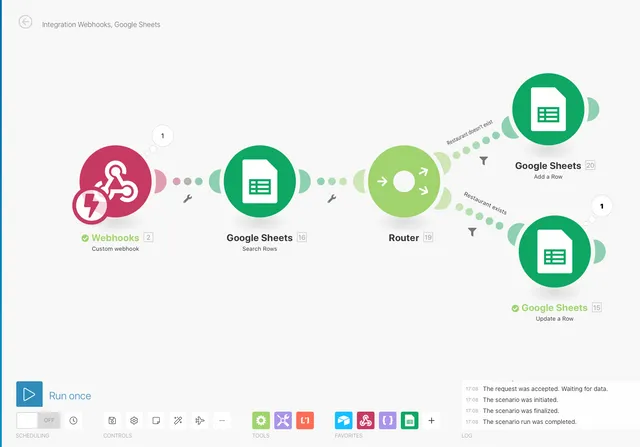
You will then be presented with the integromat scenario builder. This is where we configure and edit our scenario. Before we build anything, it’s always important to outline the steps we plan to take before we execute. For our lunch voter API, we want to:
- Allow someone to interact with our API telling us the name of the restaurant they want to upvote
- If it doesn’t exist, create a new row in our spreadsheet
- If it exists, update it’s vote count by 1
Let’s focus on the first item, and provide a way for people to interact with our API. The way we do that is through a webhook, which is at its core a way to let applications notify each other of events over the internet.
Let’s build one.
Creating a Webhook
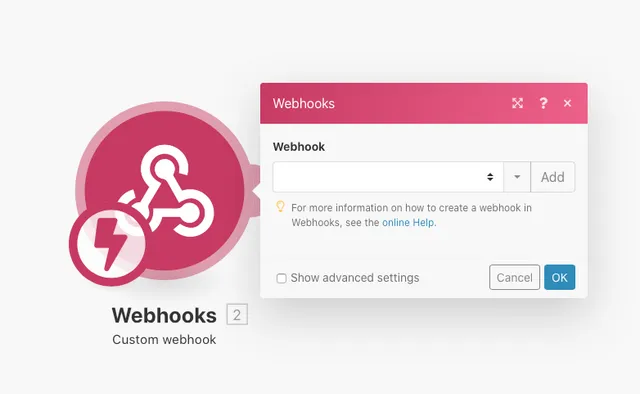
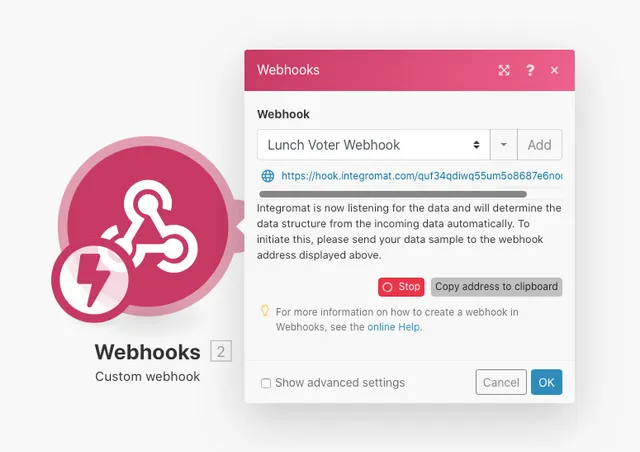
To create a Webhook in integromat, click the first module (with the large question mark) and you will see a menu to select an integration. Search for “Webhooks” and select it and you will see the options for your webhook. Select “Custom Webhook”.
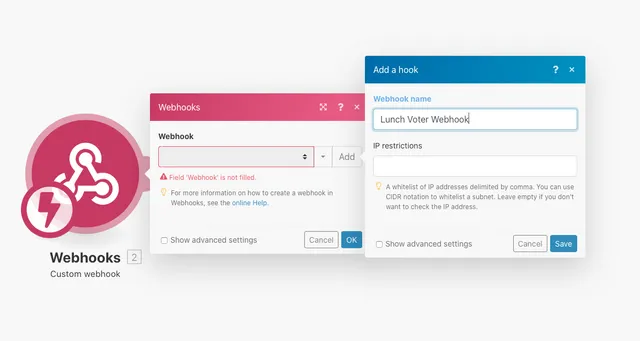
Click “Add” to add a new webhook. We are going to call ours “Lunch Voter Webhook”.
Click save and you will see a URL. This is how we will talk to our API. Copy this URL to your clipboard by clicking “Copy address to clipboard”.

Testing the Webhook
We now have an API to interact with, but it isn’t very useful yet. We need to tell the webhook what our data will “look like” so it’s able to understand when we interact with it.
The webhook is now waiting for you to interact with it. We do this by making an HTTP request to that URL. For context, an HTTP request is what happens when you visit a website. Your browser makes an HTTP request for google.com when you try to navigate there, for instance.
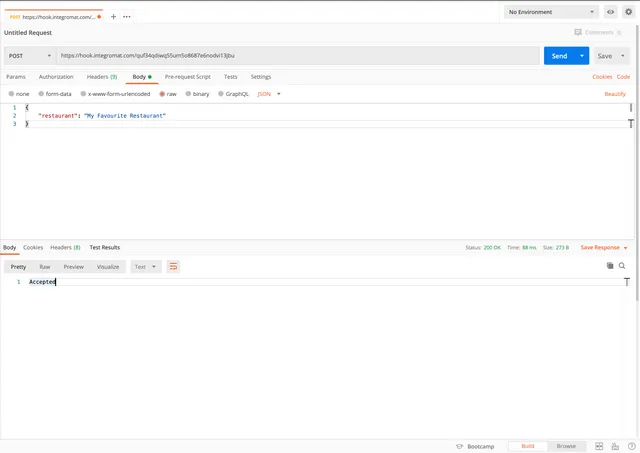
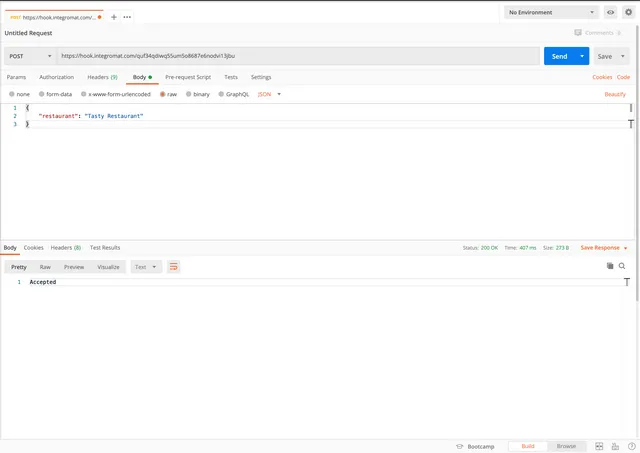
We are going to use a tool called Postman to make our HTTP request. You can download it here. Open up postman and create a new request then paste in the URL you copied earlier from your webhook in integromat. Change the dropdown beside your URL from GET to POST. Finally:
- click the “Body” tab
- click the “raw” option
- Select “JSON” from the dropdown on the right
- paste in the following to the large textarea:
{
  "restaurant": "My Favourite Restaurant"
}
Your Postman Screen should look something like this:
Click the blue “Send” button to send your HTTP request and interact with your integromat webhook.
Back in integromat, you will see a message telling you that the shape of your data has been successfully determined. Let’s store it in our spreadsheet!
Google Sheets
In order to update our google sheet, we need to check whether or not a row for the restaurant already exists before either updating the vote count by one or creating a new row. Here’s a reminder of our steps to save you scrolling:
- Check if a row exists with the restaurant name we sent in our JSON data
- If it doesn’t exist, create a new row in our spreadsheet
- If it exists, update that restaurants vote count by 1
Searching For An Existing Row
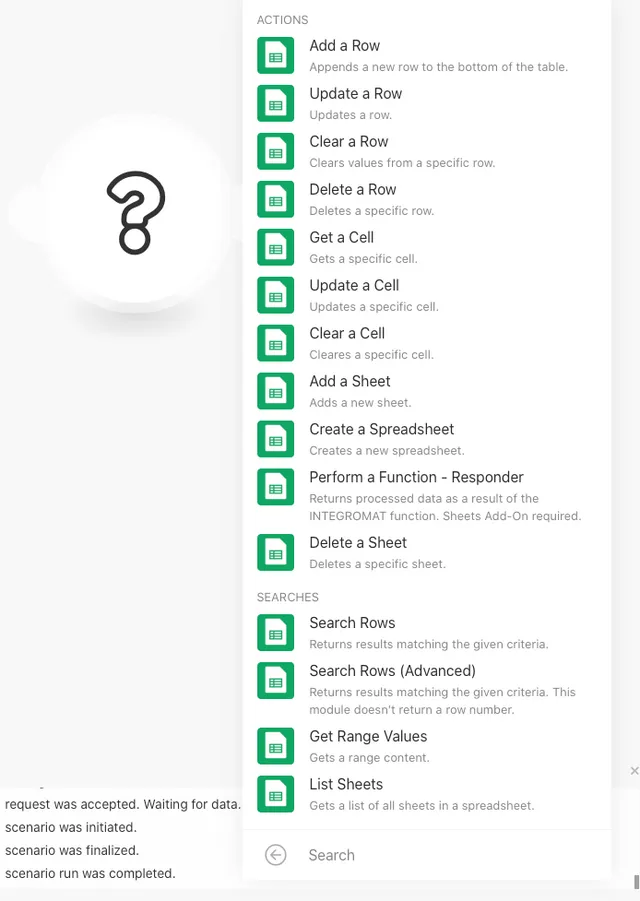
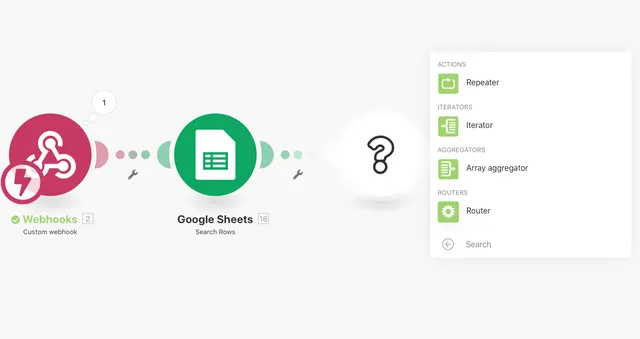
Let’s set up the google sheets module in integromat to search for a row. Click your webhook module and click the plus button to creae a new module in your integromat scenario.
- Search for “google sheets” in the search bar, click it
- Select the “Search Rows” module.
To configure your search rows module, you need to authenticate integromat with your google account by adding your google account connection. Once you have done that, then select your Lunch Voter spreadsheet and sheet.
Finally, set up your filter. This is how integromat will search your google sheet to check if a restaurant already exists. We want to check if any value in column A matches the data we are passing to our API. Your module setup should look like the following:
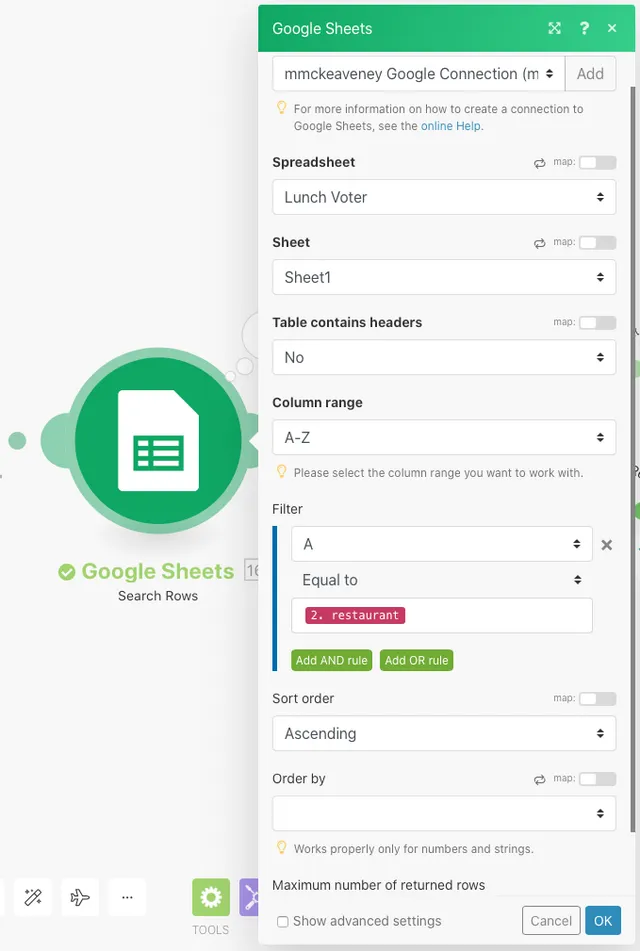
Click OK when done.
If This, Then That
Now to move on to the next step, which is to perform one action if the restaurant exists, or another if it doesn’t. In order to do that in integromat, we must use a router. A router is basically a fork in the road, where you can perform 2 different actions at once. We will use a router with a filter, so that only one of the 2 branches is run based on whether the restaurant exists or not.
Adding a new module should be getting familiar now.
- Click the plus button on the right of the google sheets module bubble.
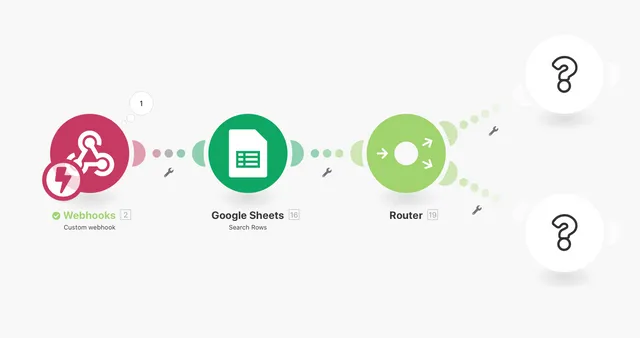
- Search for “Flow Control” and click the flow control option
- Select “Router” to create your router module. Your router will be created. Notice the 2 branches of your router.
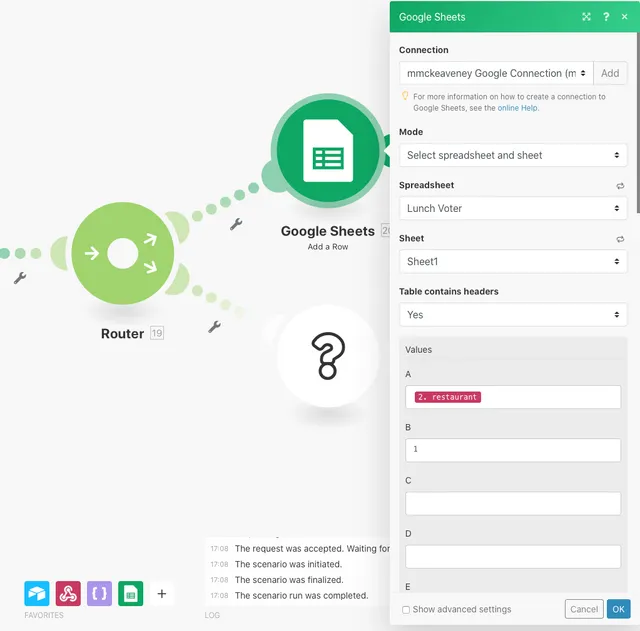
First, we will set up one of the branches to create a new row in the spreadsheet. To do this, add a google sheet module to one of the branches and select the “Add a row” action.
Configure the module to add a table to your google spreadsheet. Then:
- set the A column to be the restaurant data from your webhook,
- the B column to be 1, because it’s a new restaurant and will only have one vote.
Click OK to save your module.
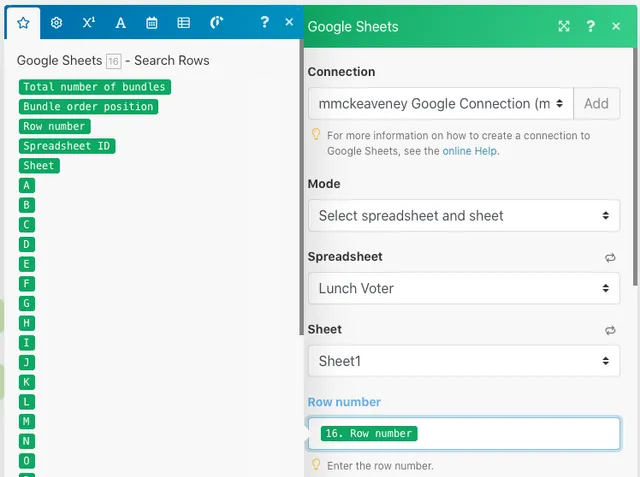
Now to set up our other branch. Choose the other module by clicking on the question mark bubble, and add another google sheets module. Select “Update a row” this time.
This one requires slightly more work to configure. We need to tell integromat which row to update in our spreadsheet, as well as use a little formula to increment the votes number by one whenever someone votes the same restaurant again.
To tell integromat which row number to update, we need to select the “Row Number” option from the menu to populate the row number option of our module. This will use the row number that we searched for by name in our previous step.
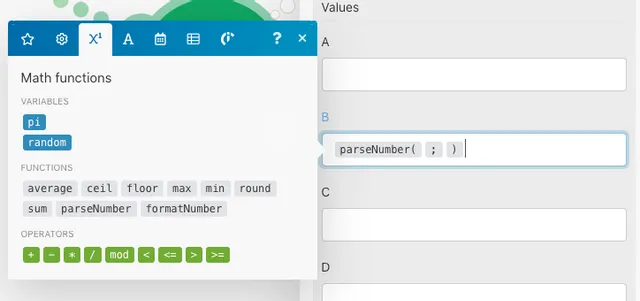
Next, we need to add a formula that will increment the value of the restaurants votes by 1. We do that by:
- clicking the “B” input under the “Values” heading in our module configuration.
- From there, find the
parseNumberfunction under the math functions tab. - Click that and it will enter a placeholder into your input field.
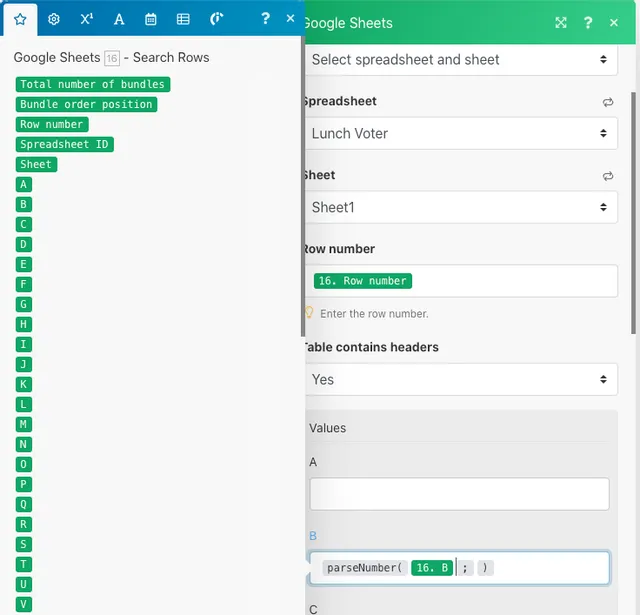
Next, we want to add the number from the existing restaurant in the spreadsheet. We can do this by going back to the star tab, and choosing the “B” option. This will use the B column value from the existing row in our spreadsheet.
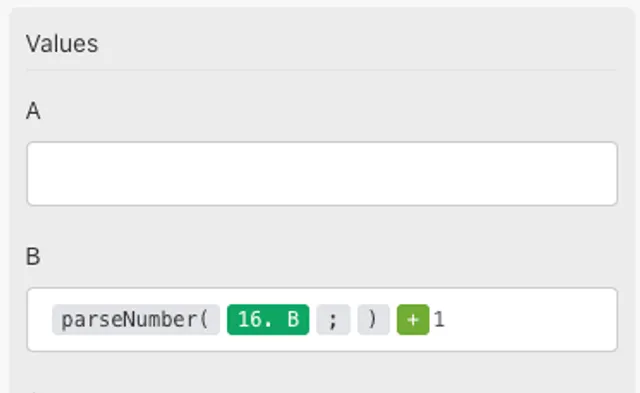
Lastly, we need to increment the vote count value by one. Click back to the math functions, and select the plus (+) button, then type 1 afterwards. Your final function should look as follows:
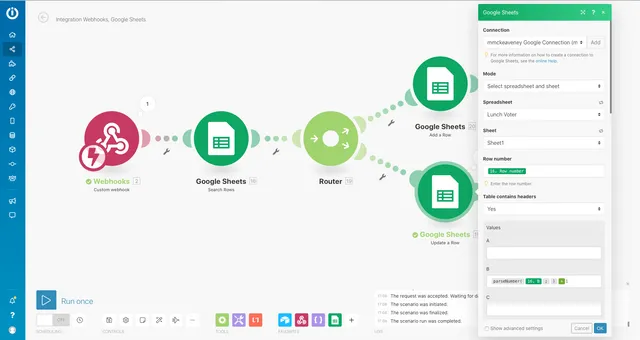
The final configuration for your Google Sheets update row module should now look like this:
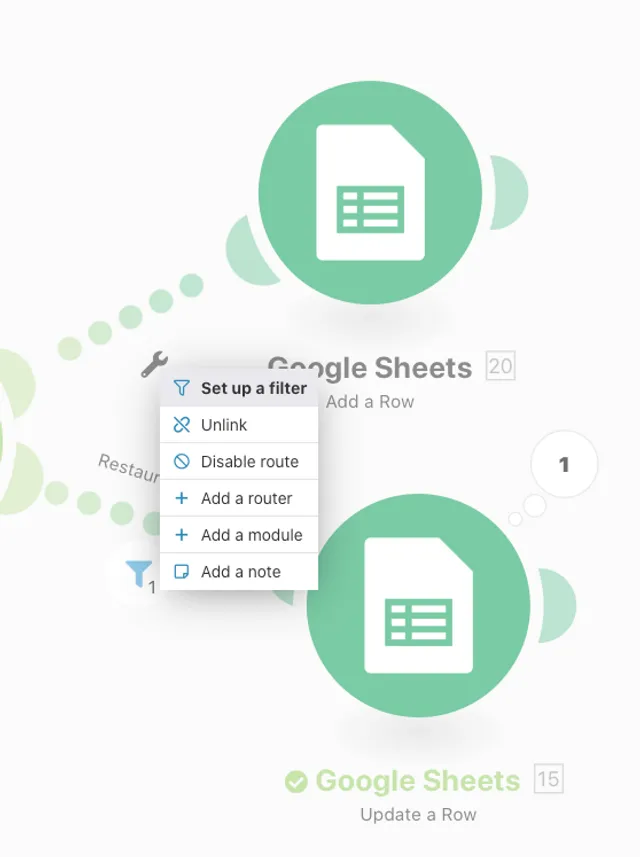
Excellent - we have all the steps in place for our API. The last thing we need to do is to make sure that only one of our branches runs at one time. We do this using a filter. Click the little spanner icon underneath the line connecting to your “Add a Row” module bubble. Choose the “Set up a filter” option.
In your filters label, enter “Restaurant doesn't exist”.
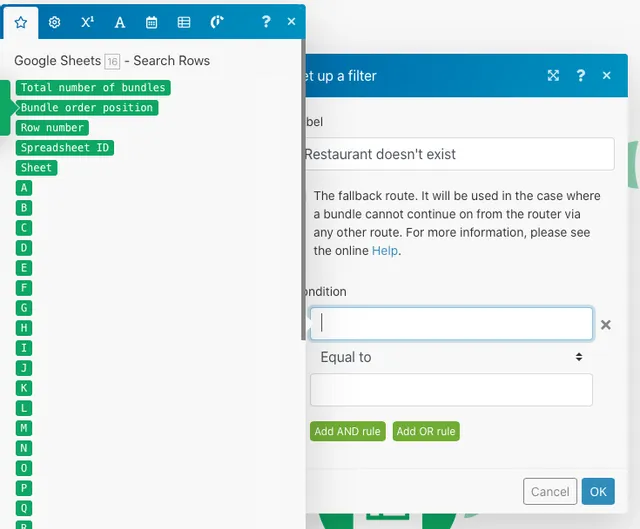
Then we must fill out our filter. This is a condition that must be true for this branch to continue on and execute the module bubble connected to the filter, which in this case is “Add New Row”. We only want the next step to execute if there are no rows already existing in the spreadsheet for that restaurant. Your filter configuration should look like the following:
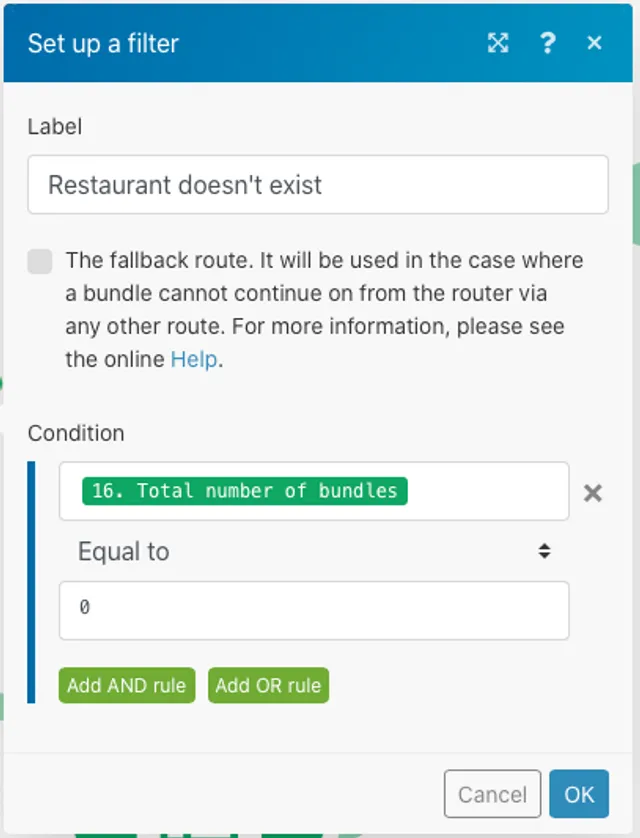
Notice how we are checking if the number of items is zero, before proceeding.
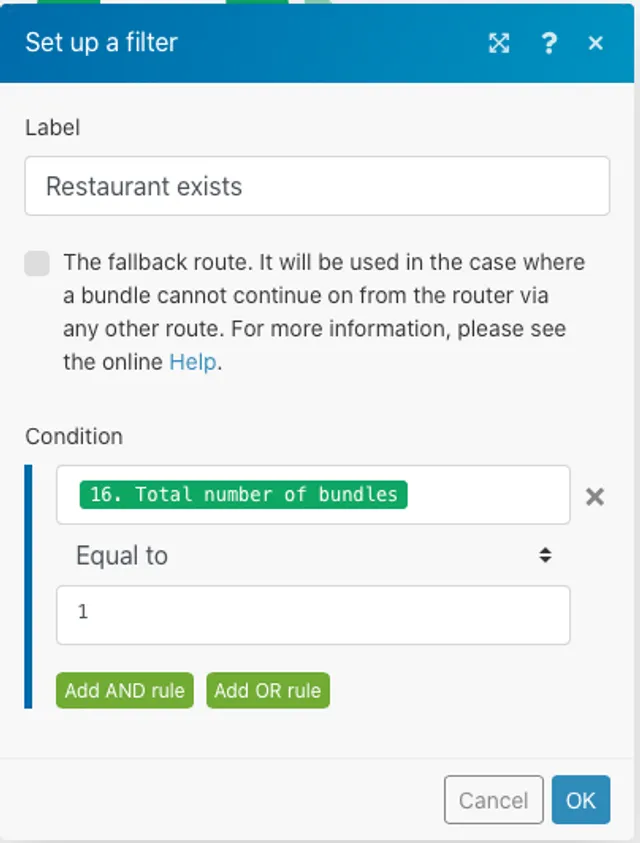
One last thing to do and our API is complete! We need to set up the filter for the other branch in our router. Click the spanner under the other branch, and fill in the information as below. We are checking that at least one row exists, so we can run the “Update Row” module if the restaurant already exists in the spreadsheet.
Click OK. Our API is now complete! Time to test this end to end and see if it works correctly.
Testing our API
Your API is now good to go. To test it, click the “Run Once” button on the bottom left hand side of your screen. This will set your API up and wait for incoming HTTP requests.

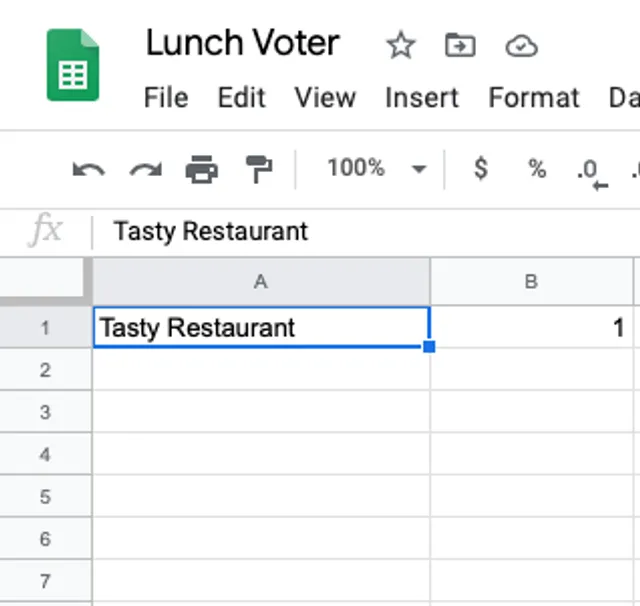
Now, go back into postman and try sending a request to our new API! Enter some data into the textarea with the restaurant name of your choice. I’ve used “Tasty Restaurant” here - I feel like I would definitely eat there if that existed. Click send to send your data to your API.
Refer back to your spreadsheet. The data is there, it works!
Try and send the request again in postman. You will notice the votes get incremented to 2. If you try and send a request with a different restaurant name, a new restaurant gets added to the spreadsheet.
Next Steps
You have just created an API without writing a single line of code. Not only will you have (hopefully) improved your understanding of APIs and how they work, but you now have an interface that would allow you to create apps and programs that talk to your API.
You could build a small web page that lets people enter which restaurant they want, and click a button, which updates your spreadsheet. You could add more modules to your integromat scenario that send an email out to the team once a certain restaurant hits 5 votes. This is the beauty of APIs - the possibilities are nearly endless, allowing consumers to interact with them in a myriad of ways.
I hope you learned something. Thanks for reading!
Feel free to reach out to me or follow me on Twitter, where I tweet and blog about JavaScript, Python, AWS, automation and no-code development.